Monday, July 31, 2017

The Line


The summer advances, the fireflies are fewer, the air conditioner needs a rest. I hope everyone is mixing some of those fantastic summer things in with all your graduate school preparations, like eating frozen bananas while floating down a river in an inner tube, or whatever your version of a fantastic summertime thing is.

This week's mission is simple and sweet, an important idea we'll conquer easily.

Drawing is a complex activity, there's no doubt about it - when your pencil is moving around the paper there are so many things to consider, keep straight, balance, and it can always be better. Many of the aspects of drawing we're looking at quickly in this summer course are massive ideas - like Proportion, from week 2 - that we could spend months profitably turning this way and that. There are several ideas, though, that we can raise, consider for a week, then stash away for when it's useful later.

Lines

We want our lines to be clear, responsive, and varied as they describe different surfaces, textures, hard and soft passages, etc. A drawing with one unchanging line doesn't pull us in - lines that have contrast interest us, helping describe the variety within the subject.

Line Weight it one of those ideas that we can absorb quickly. We have several examples here of master draftsmen from various times. Moebius, the pen name of the French cartoonist Jean Giraud, who died in 2012, was a comic book artist (and my personal hero) with a beautiful free flowing line that he could vary so subtly - here, thicker lines brings objects into the foreground, while thinner lines are for details and distant objects.


Egon Schiele had a profound sense of line, and a profound sense of anatomy, and it is remarkable to see what he conveyed just with his responsive, varied outline, with really minimal lines within the form.


Rembrandt provides the most masterful use of varied line, here with quick brushstrokes that you can almost count, but his lines and tones are so varied, accomplishing so many things - I never get tired of looking at this drawing.


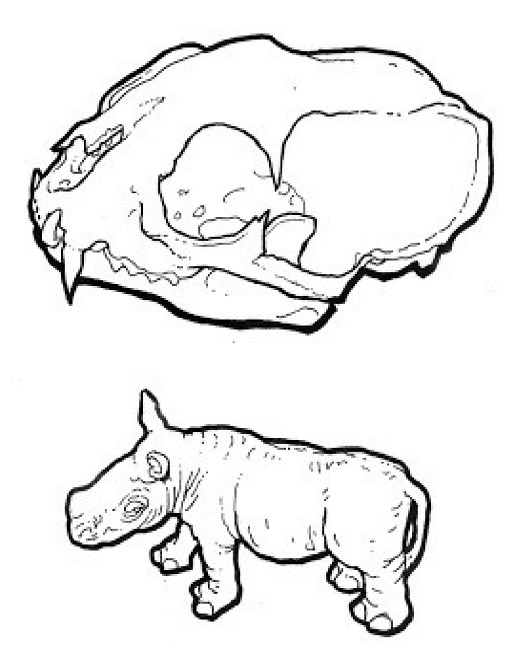
When I was a design student I had a teacher lay down the law for drawing costume renderings: your thickest line for the silhouette; your next thickest line for lines of tailoring; your thinnest line for wrinkles and texture. Boom boom boom. I learned it that way, and while I happily vary it and change it around, the clarity this approach gives is undeniable. Here are some sketches done at the American Museum of Natural History, with a nice thick silhouette and detailed passages within the form with a thinner line.


Your Mission

You may use two pens, like a Sharpie and a Mikron pen, with contrasting line widths, or you could use a pencil for this assignment. Choose a nice subject, with an interesting silhouette and interesting passages within. Some ideas:
A pile of shoes
A cauliflower
A stack of various books
A dress tossed on the floor
Six asparagus in a pile

You could also try this on the self-portrait you did earlier.

Use your imagination and surprise and charm me. Do a quick quick sketch to establish the overall form, and then draw a good strong, descriptive silhouette. Then map out important details within - what's the least you can get away with and still have a drawing that's fun to look at? Don't worry about shading, this is purely an exercise in line. Make your lines definite and continuous - we're saying good bye to the wispy, sketchy line.

Sunday, July 23, 2017

Light and Shade


Drawing, in the Western art tradition, is an agreed upon lie:  to make marks on the surface of a piece of paper that create the illusion of depth. You could, very easily, list 40 other things drawing can be about, but our concern is representational drawing, and it has a particular vocabulary of marks and tones that we accept as describing three dimensions.

Degas said we have no natural sense of form - we must teach ourselves to perceive it consciously. I was startled when I first read that in Degas's letters, but with time I've become convinced he was right (and he was, after all, Degas). As we've said before here, we have to learn to consciously master the perceptions we register unconsciously.


Here is a circle.


There are really 5 ways of convincing the viewer that a circle drawn on paper is in fact a sphere:

1) Cross Contour - we can describe the round surface with  lines, like the lines of latitude and longitude on a globe.


2) Chiaroscuro - where tonal contrast gives the impression of a light source that illuminates one part of a form more directly, while other parts fall away into shadow - we will look at this in greater detail below.


3) Overlap (also called 'Occlusion’) - one thing apparently obscuring another indicates one object is closer to the viewer than the other, and hence in space.


4) Aerial Perspective - the effect of atmosphere on objects of greater distance - a blurring of detail and contrast, and, in color, a shifting towards the blue that shows the effects of the intervening water molecules in the air.


5) Repetition of Form - the large form suggests a foreground, and the small from suggests another object the same size but in the distance
.

We're going to look at the first two ideas this week. The idea of a contour line that runs over the surface of a thing, describing the topography, is a very powerful way to understand the form. One of the reasons it's so fascinating to draw in this way is that it's immediately apparent when it's wrong - and hence is an excellent learning tool. Students, however, often tell me it 'messes up' their drawing - But not us! We will be bold and explore.

Chiaroscuro, which literally means 'light-dark,' is a much fancier way of saying 'shading' - revealing the form through tones that mimic the effect of light and shadow on a form.

Here are some thoughts:

We try to simplify the light source in our drawings - in life light bounces around everywhere, and in our modern lives we are often in environments with dozens of light sources. Here we assume a single light source, from the upper left, a traditional light direction in Western art. Light travels in straight lines until it meets an object, where light rays are either absorbed or bounce off.

On the sphere below, you can see how we see the light as it's bouncing towards us at different angles. The highlight is that spot where the light source bounces off the object directly into our eyes - the brightest spot. As the form turns away from the light source, less and less light finds its way to our eyes. If the form turns smoothly away from the light source - like a sphere - the lights subtly shades into a darker value. If it turns abruptly away, like the right angle of a cube, the tonal shift is likewise abrupt.

So here's a rule: when there's a change of plane, there is a change of tonal value.

Note the parts of the sphere here:


The Highlight, which we've discussed - the brightest point.

Twilight - where the form has turned away from the light to the point where the light just grazes the form. This is an important portion of the drawing, for it is here that we find texture expressed - and, in a color painting, this is where a red apple, say, is really red.

The Shadow Core - the darkest point of the form, where the shape has turned fully away from the light source, but is not illuminated by the reflected light

Reflected light - Light bouncing up from another surface - in this case the surface the sphere sits on - casting light on the portion of the form that is essentially on the opposite side from the highlight. The reflected light, properly understood, is really what gives the sense of a fully dimensional form. Really look at this in the world. I will really make a big deal about this in all your classes, forever.

Cast Shadow - The shape formed by the interruption of a light by an object, seen as a shade on another surface. Note that cast shadows generally have hard edges. Often in figure drawing classes teachers want the students to de-emphasize cast shadows, for these hard edges can interfere with our understanding the body as a series of smooth forms. (But for costume renderings - excuse me if I get ahead of myself here - cast shadows are extremely important and often neglected by students - the shadow cast by the hem is as much apart of the design as the hem itself).


One last thing to consider: let's imagine ten tones from white to black - if you've had art classes you likely have had to create these tones in pencil, watercolor, oil paint, etc. Jean Auguste Dominique Ingres, the Neoclassical painter, had his students mix 400 shades of gray between absolute white and absolute black - and then do a painting of the figure that used all 400 shades. We will not require that of you. But begin to look at things and see if you can separate ten shades - that is 30%, that is 80% gray, etc.


An important point: no longer can your shading be scribbly, which is how I would describe many of your drawings. To draw tonally means that we shouldn't be aware of the pencil marks, for lines that are too regular and parallel or seem random and scribbly sit too much on the surface of the paper and destroy the illusion of depth that is our goal.


A nice drawing has a pleasing balance of tone - it's up to you to decide what that balance is. But push things - make darks dark, and grays that have a full range.

Your Mission

It's summer and things are growing! And in the interest of promoting your health, I want you to buy some nice fruits and vegetables and draw them! (I worked as an cookbook illustrator when I was first out of college, and I loved that period when I always had little tableaux of vegetables on my drawing table).


Do a lovely tonal study of the fruit or vegetable sitting on a surface, with a beautiful sense of chiaroscuro. Keep the tones simple and clear.

Have fun. Don't fret. Feel free to eat your still life subject when you've completed the drawing. And here, for inspiration, are some still lives of things healthy and not, by my teacher frim my undergraduate years at the University of California, Davis, Wayne Thiebaud. He said that when you are at a loss for something to do, you can always assemble a group of things you like on a table, take some paper and a pencil, and be as honest as you can.


Sunday, July 16, 2017

Proportion


We understand things only in relation to other things. I'm tall when I stand next to my wife, I'm short when I stand next to Kareem Abdul-Jabber (which I did once).  We need a frame of reference to place everything within, and the human body - ourselves - is the obvious starting point.

As designers we get to be experts on proportion and how parts relate to the whole. We should be experts on how we fit into the world around us.

We will look at the proportions of the human figure, looking at what in Western art are agreed upon 'ideal' proportions, and how, even if none of us conform to the ideal, it can be a useful starting point.


I imagine everyone has seen Da Vinci's drawing of Vitruvian Man, a man encompassed in a square and circle. This comes from the Roman writer Vitruvius, whose 'Ten Books of Architecture' are the only classical writings on architecture to come down to us (go Google him now!). He tells us:

"For if a man be placed flat on his back, with his hands and feet extended, and a pair of compasses centered at his navel, the fingers and toes of his two hands and feet will touch the circumference of a circle described therefrom. And just as the human body yields a circular outline, so too a square figure may be found from it. For if we measure the distance from the soles of the feet to the top of the head, and then apply that measure to the outstretched arms, the breadth will be found to be the same as the height, as in the case of plane surfaces which are perfectly square."

His work did not survive Roman times with its original illustrations intact, and there were several attempts to work a plausible image of Vitruvius's ideal before Da Vinci's happy drawing. It shows how our height is, in theory, the same as the width of our out stretched arms, fingertip to fingertip.

I will confess that this doesn't work for me: the distance of my outstretched arms is shorter than my height - one of many ways I fail to correspond to the ideal.

Vitruvius also tells us "the head from the chin to the crown is an eighth [of the height of the body]" and this has been used as an ideal proportion in Classical times, to be rediscovered in the Renaissance, and taught in art schools to this day.

Is anyone 8 heads high? Look at people around you - try employing the method I illustrate here, looking at some convenient person off i the distance. Are there people 7 heads high? 7 1/2? 6?


Andrew Loomis here illustrates the useful landmarks of the body and the accepted proportions. The crotch is the mid point of the body - the length of the legs is equal to the torso and head. The lower legs are equal to the upper legs, with the knee at the halfway point - likewise the upper arm and lower arm are equal, with the elbow as the midpoint.


[Feel free to be slightly offended by Loomis's definitions of ideal proportions - these are from his 'Figure Drawing For All It's Worth,' published in 1943, and carried the attitudes of its times. But he is an excellent teacher - 'Figure Drawing For All It's Worth' has been recently republished and might be a good book to have)


Try measuring yourself against these proportions. How many heads high are you? Compare your wingspan to your height. Where do the major landmarks of the body fall on you?


Your Mission

Measure yourself thoroughly and accurately, head to toe. Measure an object (a chair, a rhinoceros, what have you). Draw yourself next to the object, calling out dimensions, midpoints, and correspondences between you and the object. You may work in the metric system if that's what you are used to, but now may be a good time to begin working in feet and inches. And take a good look at Andrew Loomis's illustrated proportions, for you will, eventually, be called upon to memorize them - but in the meantime, see how you can make this assignment fun for yourself. Send to me by Sunday, July 28.

Onwards and upwards!

Chris

Sunday, July 9, 2017

Drawing and the Inner Voice

Think of all the things - tiny and immense - that began as drawings on paper.


As a culture, we are in the midst of a great technological upheaval, and the design profession is being redefined as much as any industry today, with all the implications of the digital revolution still to be played out. But the further I go into this profession, and the further into technology (and please understand, I love new technology, to the point of distraction - I will follow a digital will-o-the-wisp all day), the more convinced I am that experience with a pencil and paper is fundamental, even primal -

- not a waste of time;

- the secret to everything.

And that is not going to change in our lifetimes.


Here's the thing about drawing - 


We don't see the world around us in a flash; we construct our perceptions through a series of darting glances at interesting bits and parts - we see the world initially as a series of 'details' that attract us. Our brains discretely - unconsciously - stitch it all into a coherent picture. We must, however, consciously teach ourselves to see the whole forms, the big picture, the larger composition that the details sit believably within.

In our drawing classes over the next three years we'll draw observationally much of the time - primarily from the human figure - and this is invaluable, a fantastic exercise, like jogging every week; it is guaranteed to make us better people. But the primary use of drawing for a designer is to draw what's not yet observable, since we, by definition, create things that don't exist yet - our drawings show our collaborators what will be in the future. So our objective while drawing observationally is to help us draw the figure when there's no figure, and the space when the space isn't before us, and the light when it isn't shining.

And we begin by learning to see through methodical observation. Really really really understanding what it is you're looking at.

That this may be intimidating to some is understandable, but you will resist the voice in your head that thinks maybe you can slide by and be a non-drawing designer who manages with computers and assistants to avoid ever picking up a pencil. It is possible to design and not draw in just the way it's possible to live in Germany and not speak German - you can manage to get by if people are polite to you and help you, but you're not really living there fully and independently.

One thing I have learned after teaching drawing for a number of years is that everyone, literally everyone, secretly fears in the center of their heart that they don't draw as well as they should. I feel this way, often; Da Vinci did. That should give us all some comfort - we're not at all alone.

I can promise you that unless you actively fight me, you will be drawing at a higher lever at the end of your first year through your practice and continual thoughtfulness about drawing, and after three years you will be AMAZING (take a moment to visualize how expressive and alive your drawings will be three years from now). So the first step is not to compare yourself with everyone else - easier said than done, I know, but try. This is all about You advancing from point A to point B in your development as a designer.


If you let it be, it's madly exciting.


Your Mission
Draw something, literally anything - perhaps something organic like a tree branch or a head of lettuce.
Use a pencil (maybe an HB pencil) and a nice piece of paper (perhaps vellum bristol, not lined notebook paper rudely torn from a pad).
Think of the point of the pencil as being the tip of your finger, and each line is your finger moving over the form. Let the drawing go where it will.


The very first thing I want us to work on is simple: I just want you to change how you think.

Listen to what you think as you draw. Quiet the voice that says 'I don't know what I'm doing. It already looks terrible. There are children better at this than me" - you know that voice. Instead, I want you to concentrate and think, 'All right, this goes Here, and then this line curves like so, then jogs a bit, then connects to that right here. And this bends out like so - or, better, like So, then it is a bit bumpy, and then smooth." Describe to yourself, forcefully, what everything in the drawing is Doing.

I really am asking you to drown out your self-critical voice with the wiser voice that's engaged in the task.
 
Tell me what you come up with.

By midnight Sunday July 16, send me the drawing, as a scan or a digital photo, and your thoughts about it, here:

chrismullerdesign@gmail.com

and I will respond.


We're off and running.


Regards,
Chris 
 
(Technical details: Please put 'Summer Drawing 2017' in the title of your email to me. Preferably don't reply to the group email I sent to everyone. Your image can be a JPEG or a PDF. Please include your name in your drawing file and not have the name be something like 'IMG_237987.' I hope that makes sense - feel free to ask questions. Onwards!)